


Upgrading or fixing a deadbolt is a straightforward home improvement project that can make a big difference in your security. Whether your lock is malfunctioning, outdated, or you simply want to enhance your entryway, knowing how to replace a deadbolt properly ensures your door remains secure and functional. This guide covers the essential steps, tools, and tips for a smooth installation, so you can tackle the job with confidence—even if you’ve never done it before.
Before you start, it’s helpful to understand the different types of deadbolts and what features matter most for your situation. If you want to learn more about the best deadbolt features for home security, check out our detailed guide for expert insights.
Let’s walk through the process step by step, from removing your old lock to installing a new one—whether it’s a traditional keyed model or a modern smart lock.
Why You Might Need to Change Your Deadbolt
There are several reasons homeowners decide to swap out their deadbolt. Common motivations include:
- Malfunctioning lock: If your key sticks, turns with difficulty, or the bolt doesn’t extend smoothly, it’s time for a replacement.
- Lost or stolen keys: For peace of mind, changing the lock ensures only authorized people have access.
- Upgrading security: Newer deadbolts often offer better resistance to forced entry, bumping, or picking.
- Switching to smart locks: Many homeowners are opting for electronic or Wi-Fi-enabled models for convenience and remote access.
For a deeper understanding of what makes a deadbolt effective, see our overview on what is a deadbolt lock and how it works.
Gathering Tools and Materials
Before you begin, assemble the following items:
- New deadbolt lock (ensure it matches your door’s thickness and backset)
- Phillips and flathead screwdrivers
- Measuring tape
- Pencil or marker
- Optional: Power drill with screwdriver bits
- Optional: Wood chisel (if minor adjustments to the door or frame are needed)
Most modern deadbolts are designed for easy installation and come with all necessary hardware and instructions. Double-check that your new lock fits the existing holes in your door to avoid extra work.
Step-by-Step: Removing the Old Deadbolt
Follow these steps to take out your existing deadbolt:
- Open the door so you can access both sides easily.
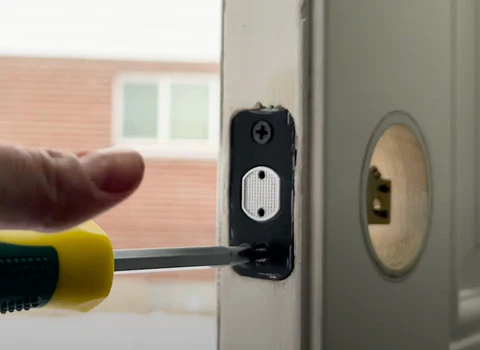
- Locate the two screws on the inside faceplate of the lock (the part with the thumb turn).
- Use a screwdriver to remove these screws. Set them aside—you won’t need them for the new lock.
- Gently pull apart the interior and exterior halves of the deadbolt. If they stick, wiggle them slightly or use a flathead screwdriver to pry them apart.
- With the lock removed, unscrew the two bolts holding the latch mechanism (the part inside the door edge).
- Slide the latch out of the door.
At this point, your door should have three holes: one through the face for the lock body, one through the edge for the latch, and a strike plate on the frame. Inspect these for wear or damage and clean away any debris.
Choosing and Installing a New Deadbolt
When selecting a replacement, consider whether you want a standard keyed lock, a double cylinder model, or a smart lock. If you’re unsure which type is best for your needs, our article on types of deadbolt locks explained can help you decide.

To install your new deadbolt:
- Insert the new latch into the hole on the door edge. Make sure the slanted side of the bolt faces the direction the door closes.
- Screw the latch plate into place. Don’t overtighten, as this can warp the plate or door.
- Align the exterior part of the lock (keyed side or keypad) with the latch mechanism. Feed any connecting bar or wires through the latch as needed.
- Attach the interior side (thumb turn or battery pack for smart locks), ensuring it lines up with the exterior piece.
- Secure both sides with the provided screws. Tighten until snug, but avoid overtightening to prevent binding.
- Test the lock several times with the door open to make sure the bolt moves smoothly and the key or code works.
- Close the door and check that the bolt extends fully into the strike plate on the frame. Adjust the strike plate if needed for a perfect fit.
If you’re installing a smart lock, follow the manufacturer’s instructions for pairing it with your phone or smart home system. For recommendations on top-rated smart locks, see this expert review of the best smart locks.
Tips for a Smooth Deadbolt Replacement
- Check alignment: If the bolt doesn’t slide easily, the holes in the door or frame may be misaligned. Adjust the strike plate or latch position as needed.
- Use the right backset: Most locks are adjustable for either 2-3/8″ or 2-3/4″ backset. Measure your door before installing.
- Don’t reuse old hardware: Always use the screws and plates supplied with your new lock for the best fit and security.
- Consider security upgrades: Reinforcing the strike plate with longer screws or a metal box can help resist forced entry. Learn more in our article on how deadbolts improve home security.
Common Mistakes to Avoid When Replacing a Deadbolt
Even a simple lock swap can go wrong if you overlook key details. Here are some pitfalls to watch for:
- Forgetting to measure your door’s thickness and backset before buying a new lock.
- Misaligning the latch or strike plate, causing the bolt to jam.
- Overtightening screws, which can strip threads or warp the lock.
- Not testing the lock with the door open before closing it—this can prevent accidental lockouts.
- Neglecting to update or reprogram codes for smart locks after installation.
Taking your time and double-checking each step will help you avoid these issues and ensure your new lock functions reliably.
Frequently Asked Questions
Do I need to hire a locksmith to change my deadbolt?
Most homeowners can handle this project with basic tools and a little patience. However, if your door or frame is damaged, or if you’re installing a high-security or electronic lock and want professional assurance, a locksmith can help.
Can I use my existing key with a new deadbolt?
Some locks allow for rekeying to match your old key, but most replacements come with new keys. If you want to keep your current key, look for locks labeled as “rekeyable” or ask a locksmith for assistance.
How do I know if my new deadbolt is installed correctly?
The lock should operate smoothly with no sticking or resistance. The bolt should extend fully into the strike plate, and the door should close and latch without forcing. Test both the key and thumb turn (or keypad) several times before relying on the lock for security.
Conclusion
Learning how to replace a deadbolt is a valuable skill for any homeowner. With the right tools, careful measurements, and attention to detail, you can upgrade your lock in under an hour and enjoy improved security and peace of mind. Whether you choose a traditional keyed model or a modern smart lock, following these steps ensures a safe and successful installation.


